

Today you will learn exactly how to start your own WordPress blog. Blogging changed my life and has given me so many experiences that I wouldn’t have had otherwise. I get to make good money and make my own hours. And I even get to do something I love for a living. I hated my old job waiting tables. It was good money but it really feels so much better actually liking what I do. Plus, you can start a profitable blog for just a few dollars a month! You also get a free domain when you sign up through my link. Let’s get started. ?
 You can sign up through Bluehost here and follow along with the step by step tutorial below.
The best and cheapest way to start a WordPress blog is by finding a good hosting company. Bluehost is a great option and has worked great for me. I went through them when I first started my own blog and continue to use them still. My experience has always been very good with them.
Starting this blog really has been such a blessing to me. I was making money in about three months and was making $2300 a month in just seven months after starting my blog. And I have so many plans that will help me to continue to grow my income. That’s another thing I really love about blogging for a living. There are no limits to what you can make if you put in the work to make it happen.
Before I started my blog, I was looking for a way to be able to stay home with my daughter (she was 18 months old at the time) and to have the possibility to be able to be financially free (a 9-5 surely would never give me that chance). I never even knew blogging was a thing that anyone could do before I came across a blog post on Pinterest about how they made $10,000 a month blogging. That surely sparked my interest! I just knew if someone else with no college degree or prior experience could do it, why not me too?
There is nothing mystical about making money with a blog even though it can seem like that before it actually happens for you. Anyone can do it. And investing in good hosting will be one of the best things you do when you are first starting out. It didn’t take me long to make my money back and if you put in the work, you can easily do the same.
Most of the successful bloggers you come across use Bluehost. It’s no wonder since they are one of the top web hosting companies available. You can start your own blog with them for as low as $2.95 a month by signing up here (I’ve negotiated with Bluehost to get my readers the best deal possible, so this low pricing is available through my link only!) I recommend signing up for their 12-month hosting plan because it will save you a lot of money in the long run.
You may be tempted to start a blog through a free company, but free doesn’t necessarily mean it’s the right option for a new blogger. If you are starting a blog for fun or for your family to read, then by all means, a free host is probably going to be your best option. But if you plan to make money with your blog, you are going to run into a lot of trouble by choosing to go the free route. You won’t have as much control over your website and simple things such as running advertisements and adding affiliate links to posts can become difficult. And as a new blogger, you want to get off to a good start. That means you will want to look professional. Free sites do not look professional and will hold you back from potential offers from companies in the future.
Plus, with Bluehost, you will receive technical support if you run into any problems and they also have a money back guarantee in case you decide blogging is not for you. That’s what sold me and helped me to get over the fear of paying for something that I wasn’t completely sure on at the time.
If you do choose to go through Bluehost for your WordPress blog, you can click here to start and then follow along with me in the tutorial below.
I’ve included two ways to learn how to set up your blog using Bluehost. If you learn easier by watching videos, I have included a short video with the same instructions that I will also provide for those of you that prefer to follow along with written directions. Starting a blog is a very simple process and only takes about five minutes to do. So let’s get started!
–>UPDATE 11/6/18: Bluehost has made things so much easier and I’ve changed this tutorial to reflect their changes. As for the video, everything is correct up to the 2-minute mark. After that, you are done. The rest is irrelevant because they look out a bunch of the old steps!
1.Pick your plan
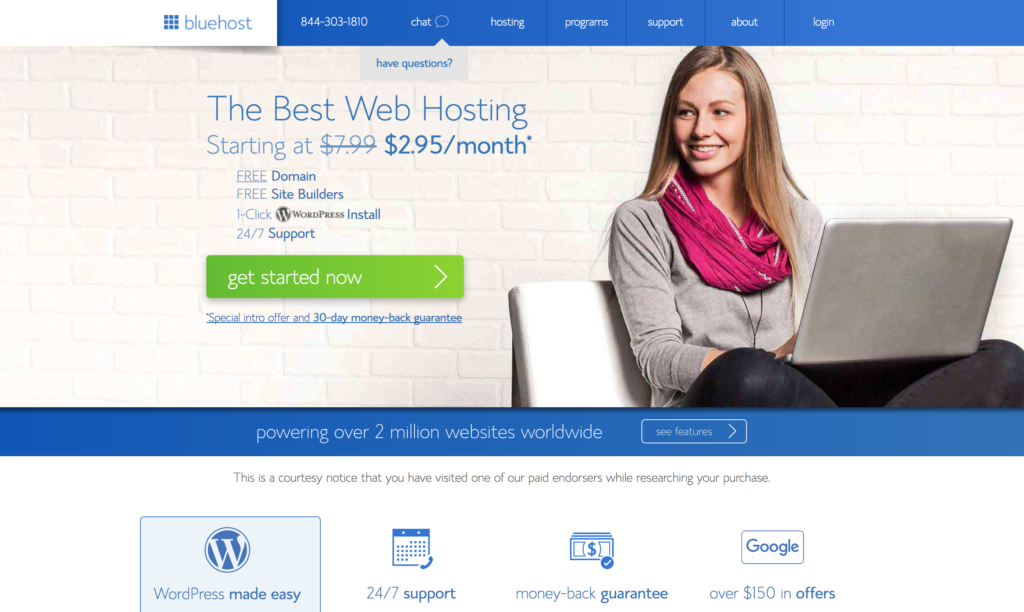
When you get to Bluehost, you will need to click on the “Get started now” button.
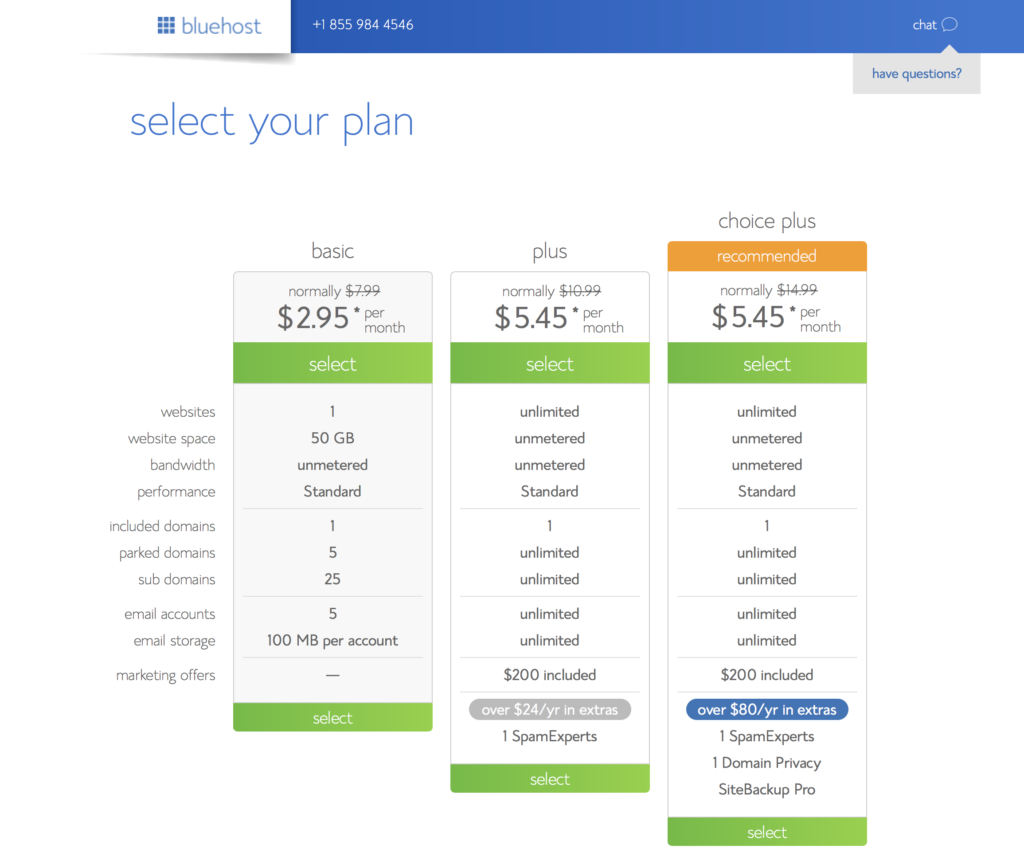
You are going to see three options: Basic, plus, and pro. The basic plan is all you need right now. Bigger packages are for blogs with high traffic coming in and lots of content on them. I didn’t upgrade my account until I was getting over 200k monthly page views because all of that traffic started making my site slow down a bit. And my readers probably didn’t like that too much. So there is no need to worry about that for a while. Plus, when you do have to upgrade, it will be worth it to you since you will be making pretty good money at that point.
2.Create and register your domain name
This can be tough. I think the best way to pick the perfect domain name that will best reflect your site is to think about what you will be writing about. There are so many types of blogs out there: recipes, parenting, finance, religion, politics, dating advice, lifestyle, etc. I like running a lifestyle blog. This means I have a wider range of things I can talk about, but I keep it within the range of my major topics (see my menu options for an example).
Choose carefully, but don’t let it stress you out. Nothing in the blogging world is as big of a deal as you think. I have wasted so much time trying to perfect things when I should have just done my best and moved on.
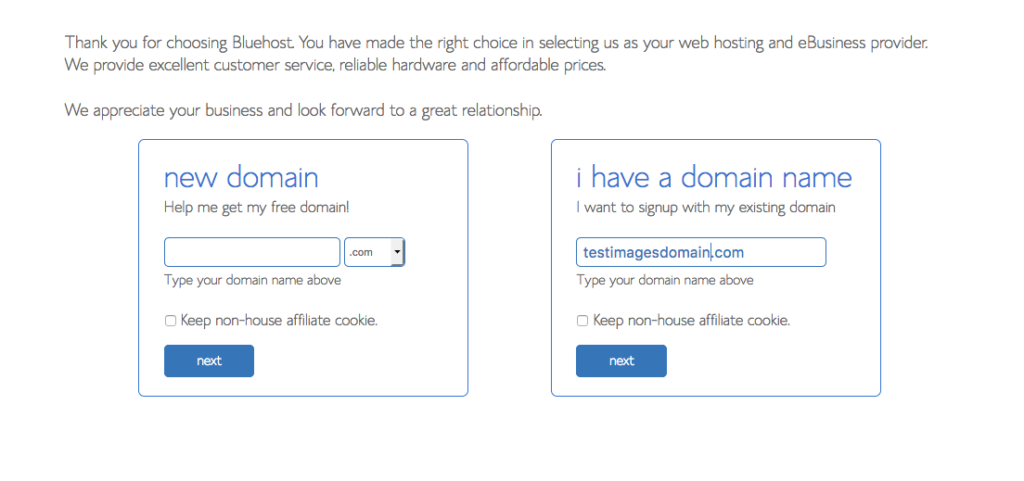
Once you click next, you will find out if the domain you chose has been taken or not. Feel free to go back and change this as many times as you like until you find a good fit.
3.Purchase hosting
Scroll down to the “package information” section after creating your account. In the drop down menu of the account plan box, you will see some different options for how long you want to purchase your hosting plan. You can choose Bluehost’s 12, 24, or 36-month plan. You save more money when you sign up for a longer term (remember you can always cancel at any time and they will credit you for the time you don’t use).
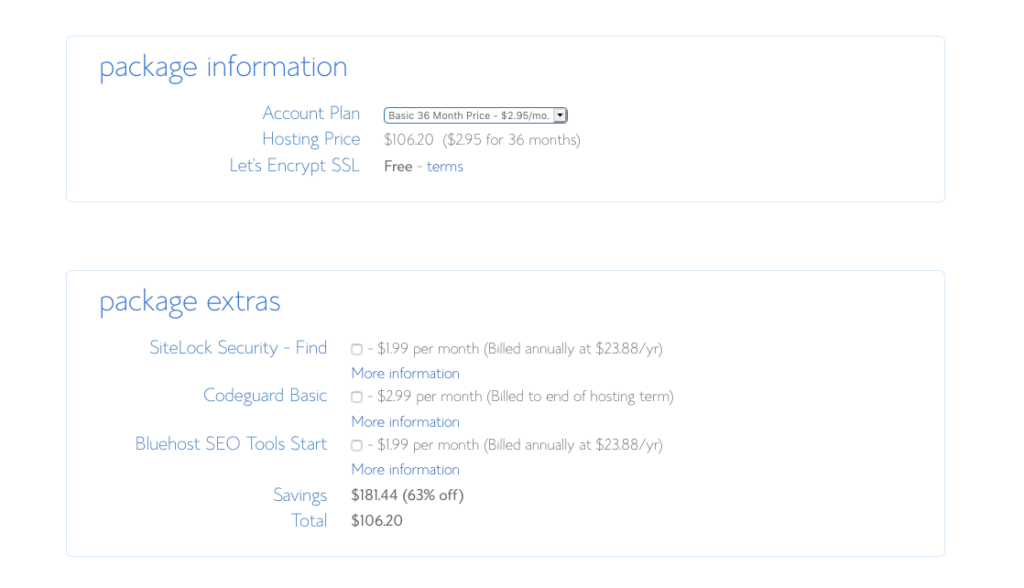
Purchasing hosting for at least twelve months is really important for many reasons. Ask yourself, do you really want to make blogging a career? If you said yes, purchasing your hosting for a year will help to reinforce your goals. Imagine yourself a couple months from now when you are getting a good amount of traffic to your blog. Dealing with your site getting shut down because you didn’t pay your bill is going to be aggravating to you and to your readers.
Right below this, you will notice some boxes and a few are checked. You really don’t need any of these, but I do recommend keeping the domain privacy protection checked. This keeps your site and email from being spammed. Also, it will keep your name and address safe too. You don’t want that getting out to a bunch of people online.
Next, you will need to scroll down and put in your payment information. Then you will be asked to create your password.
4.Finishing up
Okay, we are just about done. You will be asked to create a password. Simple enough. But then you will be asked to pick a theme. Themes are important but you do not need to pick one right now. There’s plenty of time to do that later. I recommend just moving onto the next section.
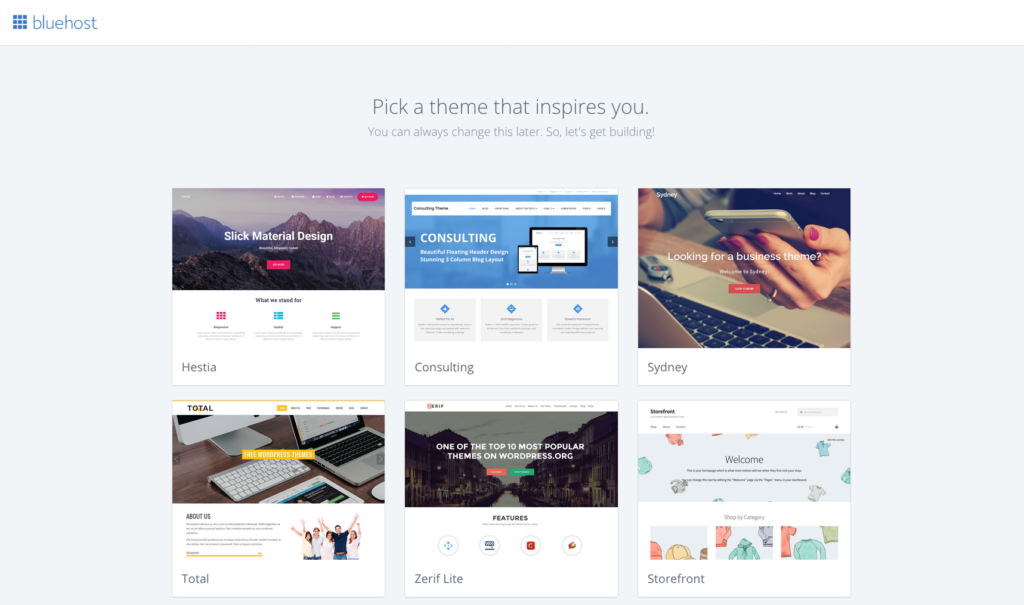
So now just click start building and you will be taken straight to your WordPress dashboard! This is where you will make all the changes to your website (theme, adding posts, etc.)
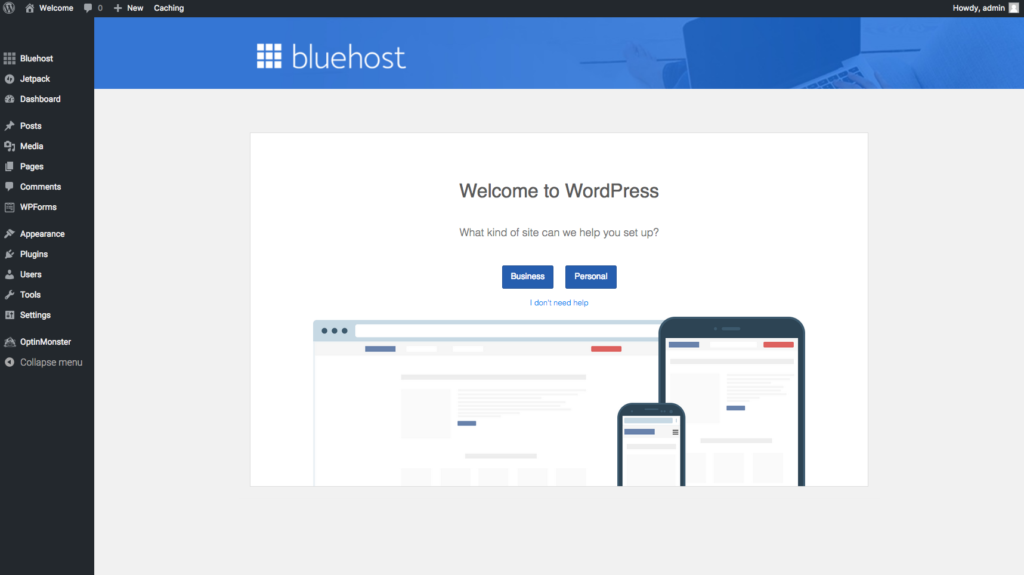
All done! You are officially a website owner and are on your way to creating a career that has so many possibilities!
Now, you are free to create content and design your site however you want. You can check out my blogging recommendations here to see all my favorite blogging products, plugins, courses, etc (many of which are free). I got lucky when I started my blog and got good advice so I want to do the same for you. Nothing is worse in the blogging world then venturing down the wrong path and wasting time and money!
Navigating your WordPress dashboard
Now that your website is all set up, you might be thinking… So what do I do now? I remember thinking the same thing. Navigating WordPress is super simple, but you can spend a lot of time actually setting things up if you don’t know what you are doing.
1.Theme setup
If you hover over “Appearance” you will be able to click on “Themes” to change what your blog looks like to your readers. There are many options to choose from.
You can choose a free theme or you can purchase a theme that will look much more professional. If you choose to purchase a theme I recommend Studiopress and/or Restored 316. My blog is currently running on both (parent and child themes). This can be changed at any time so if you are on a tight budget, a free theme is fine for now.
2.Setting up your own navigation menu
You will need to hover over “Posts” and click on “Categories”. These will be the main topics you write about. You will also need to arrange them, which you can do by hovering over “Appearance” and clicking on “Menu”.
3.Creating a post
Hover over “Posts” and click “Add new” to create a new post. You can insert your title, write posts in the body, choose which category you want this post to fall under, and much more.
4.Adding images
You can go to the “Media” tab to add an image to your site. To add an image to a post, you can click “Add media” from the new post page. I just upload any images that will be in my posts from here.
5.Adding content to your sidebar and footer
Hover over “Appearance” and click on “Widgets” to add things like popular posts and your author bio.
6.Adding pages
Click on the “Pages” tab. Here you can create pages like your about me, contact, and privacy policy pages. Which you can later add to your menu or footer.
7.Plugins
You will be using plugins for things like adding share buttons to your post and tracking your stats. You can upload them directly under the “Plugins” tab.
8.Seeing what your website will look like
Click the little house icon in the upper left-hand corner of the screen.
If you run into any trouble what so ever, please don’t hesitate to send me an email. I would be more than happy to help you! Good luck on your blogging journey!
Have any questions or comments? Let me know down below!

Amen about advertising the things you like . I think a lot of people make that mistake
Hey, Erika. So many people want to start making money quickly with blogging and end up hurting themselves in the long run just to make a small amount of money. It’s not worth compromising your readers trust.
I’m a mom in my 40’s, at your young age I like the way you word things, it is true that only you can word things the way you do. I have one foot in this century and one foot in the 12th century. I LOVE Pinterest, however I still do not have a Facebook or Twitter account, I will start my blog soon, but reading your post has given some better clarity on how to fish through things and whats necessary. Thanks so much for that. One question, did you gradually add things in after you started your blog? Or did you have them up all at once when you started? Could you send me an email on tips? Thanks again, keep posting and I will pin your stuff!
Hey, Mona! It’s great you’re planning on starting a blog. That’s always exciting! I’m glad you found this post helpful. Actually, I did a ton of research before so pretty much everything was in place when I went live. Some things I could have gotten away with not having since hardly anyone visited my site in the first month or so. Initiation phase lol. I’d say bare minimum to have when starting out is a wordpress site and a nice theme. Nothing else is that big of a deal at first. ?
Good points – all of them. I like your concluding section. It’s about working your butt off. The potential is huge indeed, but most people won’t stick to it. I think you really need to have the bug for this to work and really really enjoy blogging.
Hello, Anne. I agree completely. It’s certainly worth it. The initial start up phase and getting your blog off the ground is the hardest part. But it’s worth all of the hard work! ?